Medieval Looking Tapestries / Wall-Hangings using a Batik Method
Many of my ideas came from the website from HGTV, I'm just applying it to a different genre.
Materials:
Step 1 Preparing the Fabric
Wash the fabric in hot or warm water and dry on high. Iron flat. Since it won't be washed again, hemming the side is probably not necessary (I like the ragged look), but do trim the straggling threads.
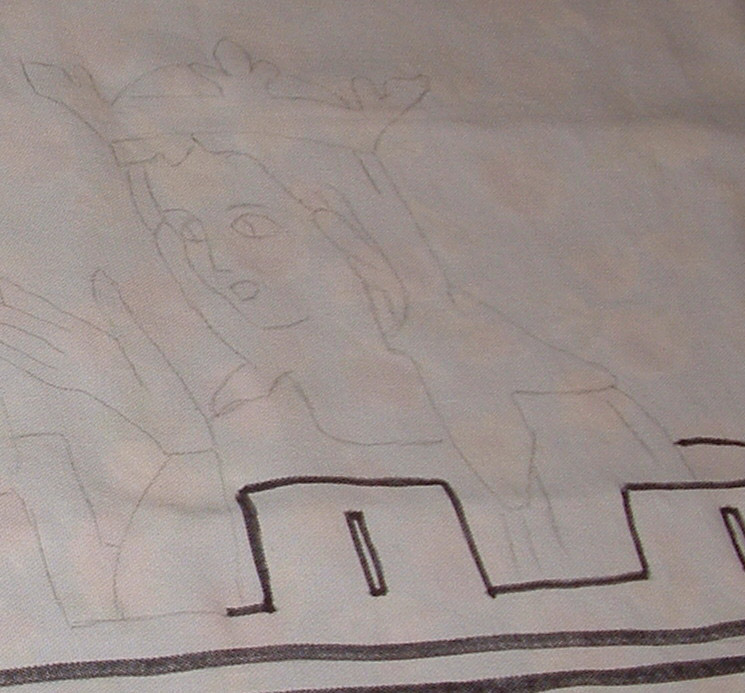
Step 2 Tranferring the Design
If you can do it freehand, great. I used a projector. I tacked the cloth to the wall (top an bottom). Projected the image onto the cloth, then pencil traced it.
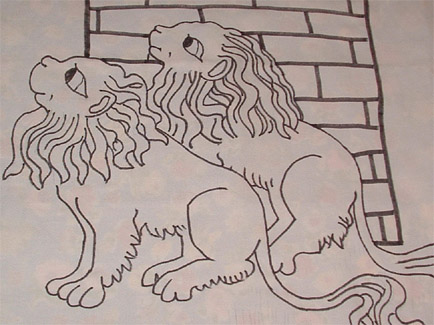
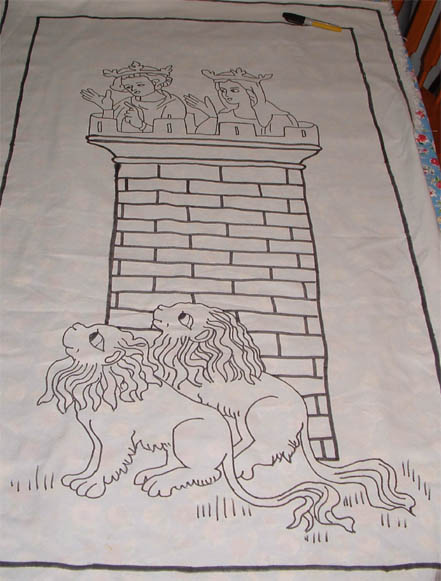
Next, lay the cloth on a flat surface, and blacken the lines with the marker.
Click to enlarge
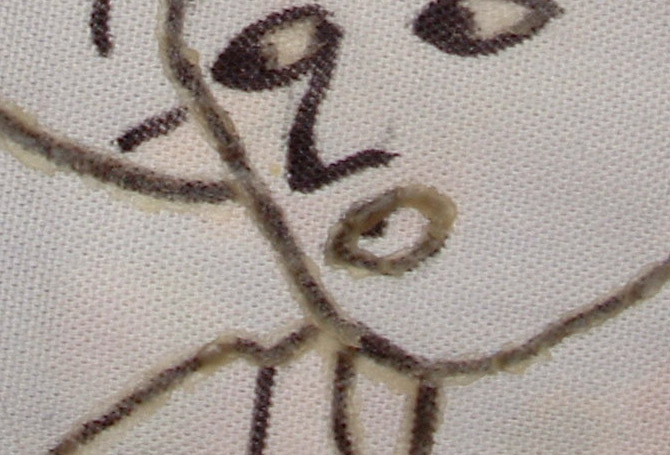
Step 3 Waxing the lines
Plug the crock pot in at least a half hour before you need it. Make sure the wax is really hot before you use it.
Use variou size brushes. For the thin lines, I use the cheap children's plastic paint brush, which I cut half the brissles off and trimmed the reaining to anout 1/4 inch.
Get a bead or dropplet of melted wax on your brush. Place the brush on the line and push the melted drop along the line until the wax starts to get cloudy. A drop usually goes about 1/4 to 1/2 inch before it gets cloudy. At this point it is no longer absorbing into the fabric, and it will not act as a barrier for the dye. The thicker lines as easier to wax. Try to keep the wax either entirely within the line or as close as possible. Remember, any wax outside of the lines will be a white spot in your tapestry.
Hints
You only have to wax the lines where there will be a color change. Lines that
are for shape, the folds of a robe for example, do not have to be waxed.
If you spill a stray drop here and there on the cloth, let it dry completely
before picking it off.
Keep the crock pot of wax near where you are working. It keeps the drips down.
Place a thick mat under the crock pot if you place it on the cloth you've already
waxed. The bottom gets hot and will melt the wax on the cloth.
If the wax builds up on the brush, roll in on the side of the crock pot to melt
it off. It also helps keep your brush hot, which helps keep your wax hot on
the brush.
Click to enlarge
Waxing the lines is the most tedious part. Mistress Francesca suggested using fabric resist, so I'm ordering some. It is what they use for Japanese silk art. It comes in colors, metals and clear, so it should replace the black lines.
Step 4 Creating White Work
To create the effect of white work, you can use a water soluble cloth marker or pen to draw your design. Then wax the design. Use a color that bleeds very little. In the batch that I bought, the red bleeds almost not at all.
Click on pics to enlarge

With wax still on
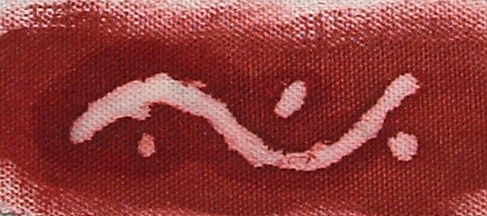
After the wax is removed. Okay, on a close-up, it's a little sloppy, but when
seen on the whole thing, I think it'll look pretty snazzy.
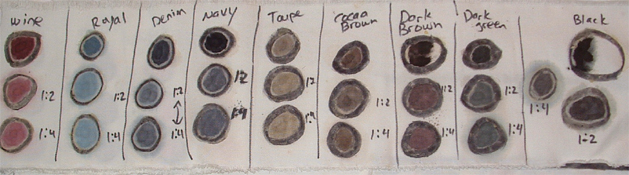
Step 5 Choosing you Colors
Before choosing your colors, I recommend making a color chart with the dyes you have. Round wax circle on a piece of cloth (the same as you are using). 3 circles for each color - one for the full strength dye undiluted, one for the dye diluted at a 1:2 ratio, one for the dye diluted at a 1:4 ratio. This will not only let you preview the color, but will also let you know which dyes run worse than others.
When choosing your colors, keep in mind that for the really small areas, colors that bleed badly are not the best choice.
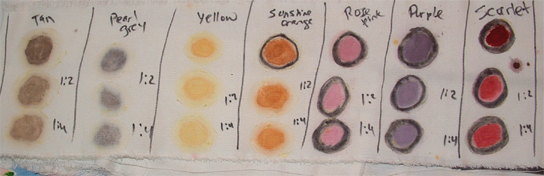
Mixing needed Colors
Sometimes you'll need a color that you can't find or RIT does not make. After running around town looking for Ecru (a ivory color) to use for flesh tones, THL Cristina told me about me about the Creating Custom Colors Page on the RIT Dye site. (Thanks Cristina!) Don't use the recipes as recipes, use them for the proportions. You still want to use either undiluted dye or dye that is slightly diluted. So a recipe that calls for 1/2 tsp each of 2 colors would be a 1 to 1 ratio for mixing.
Flesh tones
For the flesh tones, I used the ivory recipe and diluted it. I used one drop (NOT dropperful) yellow, one drop tan and 2 DROPPERFULS water. The dropper I used is about 1/16th or 1/8th tsp, but play around with what you have to find the right shade. Rememer, the mixture dries lighter than it goes on.
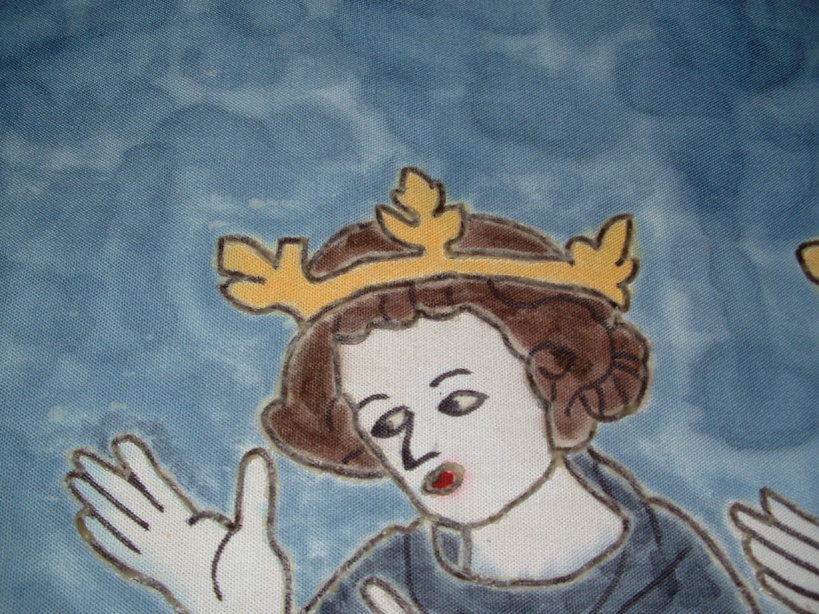
Step 6 Coloring your Design
A little dye goes a long way. Don't over saturate your brush; it will just cause the dye to bleed more. Wet your brush, and start in the middle of the area. That way if the dye spreads, you can gauge how much it will spread. The natural fiber brushes hold the dyes better than the pure plastic without getting over saturated.
When coloring the edge or near a color border, to prevent one color bleeding into another, use a completely dry brush. Get a little bit of dye on the tip, trying not to wet the brush at all. Use little strokes to apply the mostly dry dye to the area. This will help with bleeds.
Use your brush strokes to emphasize the pattern of the area. For example, grass should be in up and down strokes and stone in side to side strokes.
Click Picture to enlarge
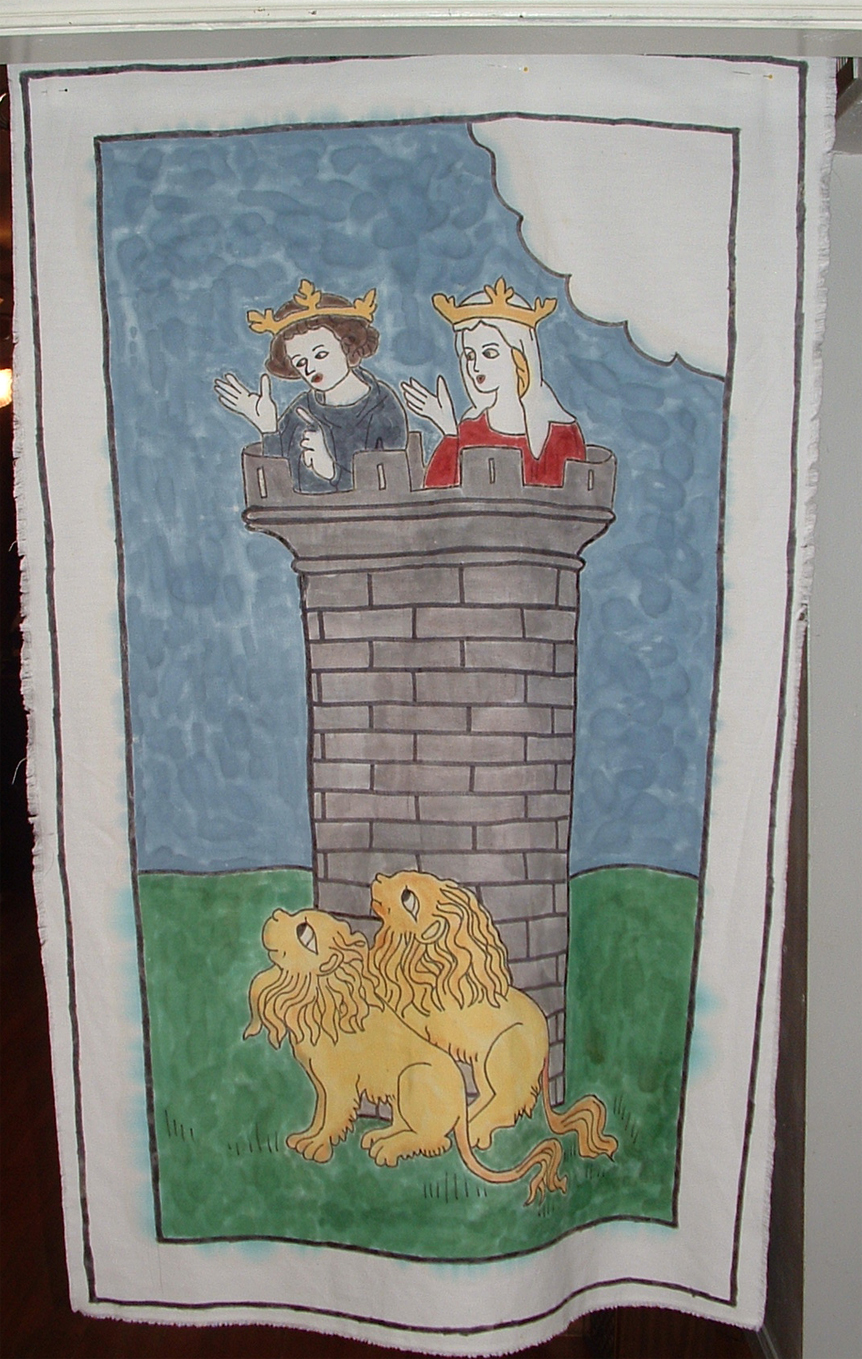
I have not yet done the white work, plus I have not found a good flesh color.
But here is the wall hanging almost finished. I wish the sky were a little lighter
shade of blue, and I would probably not add the cloud.
Step 7 Getting the Wax Out
When the fabric is COMPLETELY dry, sandwich the waxy areas between 2 layers of newspaper or brown paper bag type paper. Heat your iron to high heat, amd iron the paper/cloth/paper sandwich until the paper fills with the wax. Once the paper is filled with wax, discard and apply a new piece of clean newspaper or packaging paper and continue ironing until wax in mostly removed from cloth. Stop once very little or no wax bleeds through on to the paper.
click pics to enlarge
 with the wax still on
 With the wax removed
Step 8 Hem
If you do not want a seam showing but want to have a fold of fabric on the top for a hanging rod, you can use the iron-on adhesive hem.
Step 9 Sealing the work
The cheap, clear acrylic spray. A coat on the front and a coat on the back.